Create an ad-hoc or Internet access point (hotspot) with Virtual WiFi
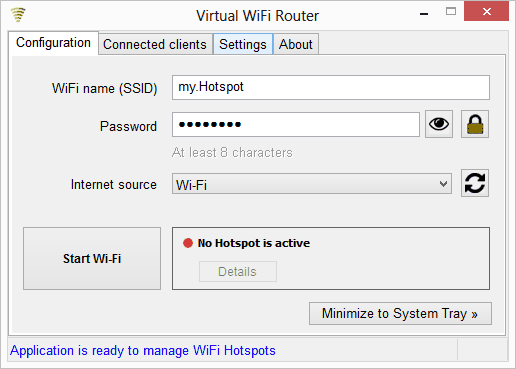
To create a Wi-Fi network hosted by the wireless adapter card of your computer you must first enter a hotspot name and a password, and then choose the desired type of hotspot by selecting either the name of the Internet connection you want to share or the option 'Without Internet connection (ad-hoc) or, if there are multiple connections available then you can select an auxiliary option named 'Best Internet connection' - which detects and automatically select the best Internet connection available.
For a better security enter a strong password (capital letters, little letters and digits in a succession without meaning) or choose to generate a strong password by clicking on the lock icon.
To view the password entered or generated press the eye icon, to refresh the list with connection available to be shared press the refresh button, and finally, to start the Wi-Fi hotspot with the specified characteristics press the 'Start Wi-Fi' button.
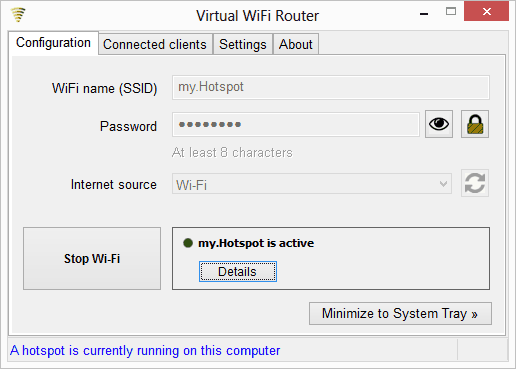
Once the hotspot is active, you can stop it by pressing 'Stop Wi-Fi' button, see some internal details about the hosted wireless network by pressing the button 'Details' or see a list with the devices connected to the created Wi-Fi hotspot by accessing the 'Connected clients' tab.
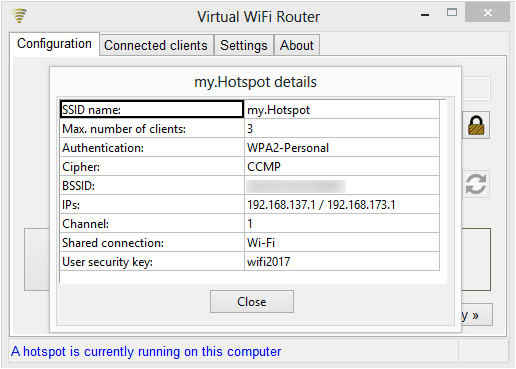
In the 'Details' window will be shown the maximum number of clients that can be connected simultaneously, the BSSID (the MAC address of the wireless adapter and also of the virtual router), the channel, the password used and the IPs (default gateways) that will be used by the virtual router - by default, 192.168.137.1 is used for shared Wi-Fi networks, and 192.168.173.1 for ad-hoc Wi-Fi networks.
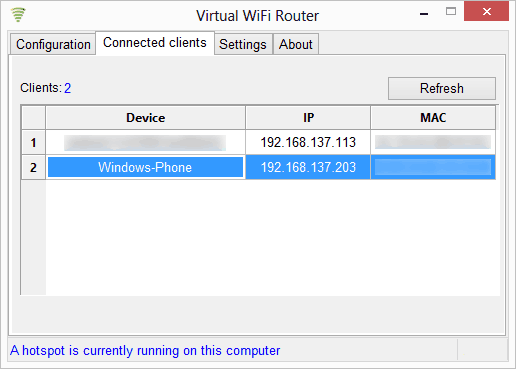
See the devices connected to the hotspot
By accessing the 'Connected clients' tab you will see all the devices that are connected to the hotspot or are in the process to do so. If the option 'Enable auto-refresh of the connected clients list' is checked in the 'Settings' tab, the devices are automatically detected, otherwise you must press the refresh button every time you want to see the updated list of the connected clients.
Change the way Virtual WiFi program is functioning
In the 'Settings' tab you can modify various options regarding either the application itself or the IP configuration.
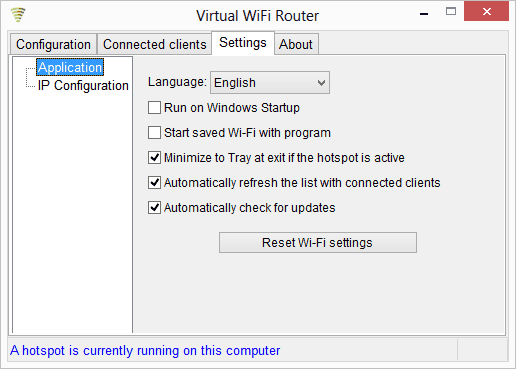
In the 'Application' subtab you can change the following options:
- Language - let you select the display language of the application (the change will be instant, and won't required a restart of the application);
- Run on Windows Startup - if enabled, the program shall be automatically started with Windows login;
- Start saved Wi-Fi with program - if enabled, the previously configured hotspot shall be automatically activated once the program is running;
- Minimize to Tray at exit if a hotspot is activated - if checked, when the user close the main window of the program and a hotspot is currently running, the apllication wil not exit but shall be minimized to System Tray instead. You can close the program or show the main window again from the System Tray zone of the program.
- Automatically refresh the list with connected clients - if checked, the list with connected devices shall be automatically updated, at a variable refresh rates.
- Automatically check for updates - if checked, the program shall check if a new compatible version of the program is available (the check is made only once per session, when the program is opened or when the option state was changed to checked after it was unchecked).
- Reset Wi-Fi settings - reset the settings and the cache of the hotspots created by the application.
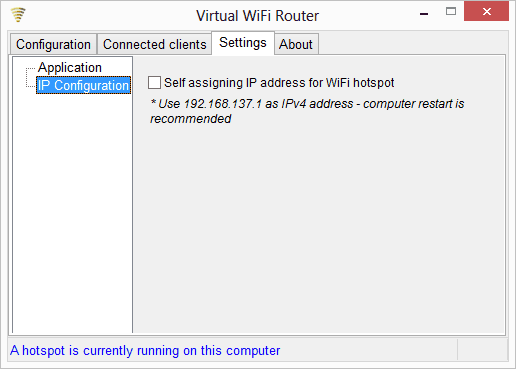
In the 'IP configuration' subtab you can choose the following option:
- Self assigning IP address for the created WiFi hotspots - if checked, the IP address used by the DHCP service in Windows for Wi-Fi hosted networks is set to the default, which is 192.168.137.1 for hotspots with shared internet connection or 192.168.173.1 otherwise.
Important notes:
Self assignation of the IP address is disabled as default, the enabling should be done only in case in which the hotspot is successfully created but the devices cannot connect to it - the problem being that Windows cannot assign a valid IP address to the virtual hotspot, thereby the resulting connection will be either unavailable or will be without Internet access. If you opt to activate this option, a backup with the initial settings will be created, so the disabling will cause the restoration of the initial settings. This option is tipically enabled when a previously program such as Virtual WiFi was runned on the computer and it changed the default configuration of the DHCP server.
If the option 'Enable auto-refresh of connected clients list' is checked, the program will use additionally processor resources - in most of the cases, this isn't a problem at all (it will use below 0.5% of processor capacity, on a normal computer).
